Windows update service utilizing high CPU and memory
We had a major issue where, all of a sudden, many computers running Windows 7 had an issue with the windows update service utilizing high CPU and memory. The problem started to become serious and began to affect productivity as users complained of system slowdowns and lock ups. Not all computers were experiencing the issue but enough of them were and it seemed to be slowly proliferating. I suspected the issue was more widespread than we thought but folks were just dealing with it and not reporting the problem. At any rate, we wound up opening a ticket with Microsoft. After many weeks of troubleshooting the issue with Microsoft technicians, a solution was finally realized. The issue was caused by WSUS.
It turned out that the WSUS server needed some much needed maintenance performed. Apparently the System Center Configuration Manager (SCCM) client and/or the windows update service has to read through the entire WSUS database including all “declines” and “superseded” updates. Depending on your WSUS environment, this list of old updates can grow considerably if you do not perform regular maintenance on your WSUS environment. This will eventually cause trouble for the SCCM client and WU service on client computers. Who knew?
Below is an article by a fellow co-worker of mine. The first part includes a quick summary of the process. The second part includes a more detailed step-by-step process. Use the processes documented below to resolve this issue.
Summary WSUS Cleanup process
1. On the main WSUS server, open the Windows Update Services MMC.
2. Select the All Updates View: Set the display to show the Approval status of ‘Any except Declined‘ with a Status of ‘Any‘. Click Refresh.
3. Display the Supersedence Column: Right-click the column headers and select Supersedence
4. Sort by Supersedence: Left-click on the Supersede Column.
5. Select and decline the superseded updates.
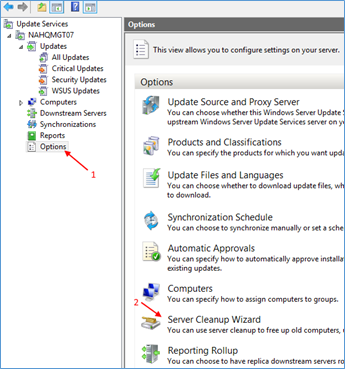
6. Go to options pane on left; Run “Server Cleanup Wizard“; leave all options checked complete the wizard
The updates to be declined have one of two particular flowchart symbols for their updates as shown below. Select the correct updates and decline them by either right-clicking the selected updates and clicking Decline, or by pressing the Decline button in the action pane.
IMPORTANT You must select only the updates that have one of the two icons below. There are a total of 3 icons that may appear here and you are to select the following 2 only.
 – This means the update is superseded by another update and it supersedes another update.
 – This means this update is superseded by another update. Below is a snapshot that shows updates that have been superseded by other updates.
Detailed Step by Step WSUS Cleanup process
1. Open the Windows Update Services MMC.
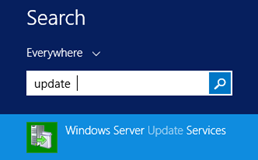
2. Select the All Updates View: Set the display to show the Approval status of ‘Any except Declined’ with a Status of ‘Any‘. Click Refresh.

3. Display the Supersedence Column: Right-click the column headers and select Supersedence
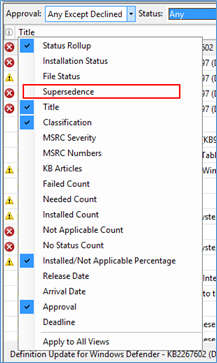
4. Sort by Supersedence: Left-click on the Supersede Column.
Icon Key:
 – This update supersedes other updates
 – This Update is superseded by another update and it supersedes another update
 – This Update is superseded by another update.
5. Select and decline the superseded updates.
Select only updates with these icons.
 – This Update is superseded by another update and it supersedes another update
 – This Update is superseded by another update.
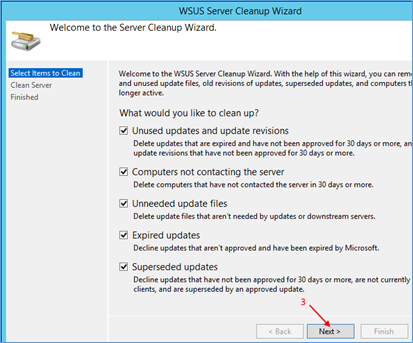
6. Go to options pane on left; Run “Server Cleanup Wizard“; Leave all options checked complete the wizard
 |
 |
Coincidentally, a couple of weeks after we closed the issue with Microsoft, the following Technet article surfaced. It is a great article and contains a lot of good information. If you are responsible for administering SCCM and/or WSUS at your company, please take a look at the following Technet article below.
I hope this post helped you out. If so, share it with your co-workers or leave a comment. Good luck.

