Create a drop down menu in WordPress
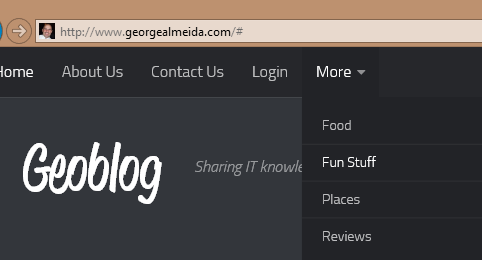
As I was redesigning my blog, I came to a point where I wanted a drop-down menu on the top main navigation menu. I thought it would be really easy but it was a little trickier than I thought. I did some quick searches on the Internet but didn’t really find anything. It is really easy to build menus in WordPress and create drop-down or sub-menus, however, I did not want the top-level dropdown menu to link to anything. For example, see the image below. I created a drop-down menu named More, but when you click on it, it doesn’t link to a separate page, link or category. If someone accidentally misses clicking the drop-down arrow, they are not accidentally redirected anywhere. Instead, they stay on the home page. This article outlines the step to create a drop down menu in WordPress.
This image shows the More drop-down menu

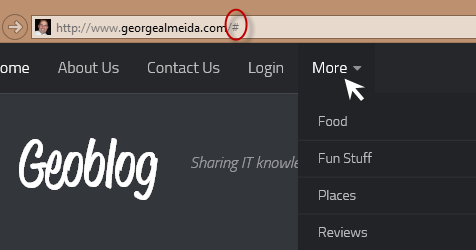
When someone clicks on the More drop-down menu, you want it to not do anything. Notice the # symbol at the root of the website.
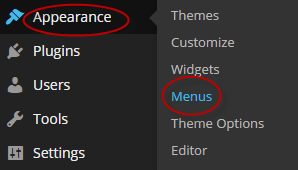
To create a drown-down menu like the one above, in WordPress, select Appearance, then Menus.
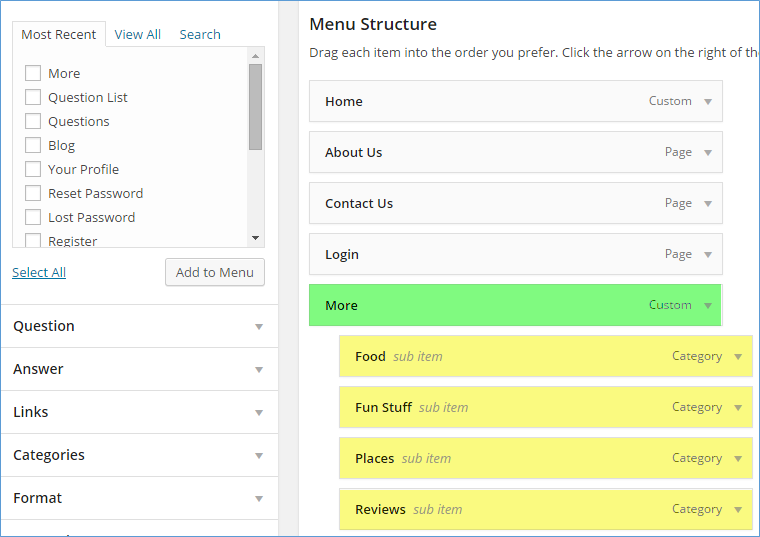
Select the Home page and Add to Menu. Change the URL to the “#” symbol. Also change the Navigation Label to “More” or whatever you want the drop-down menu to be named.
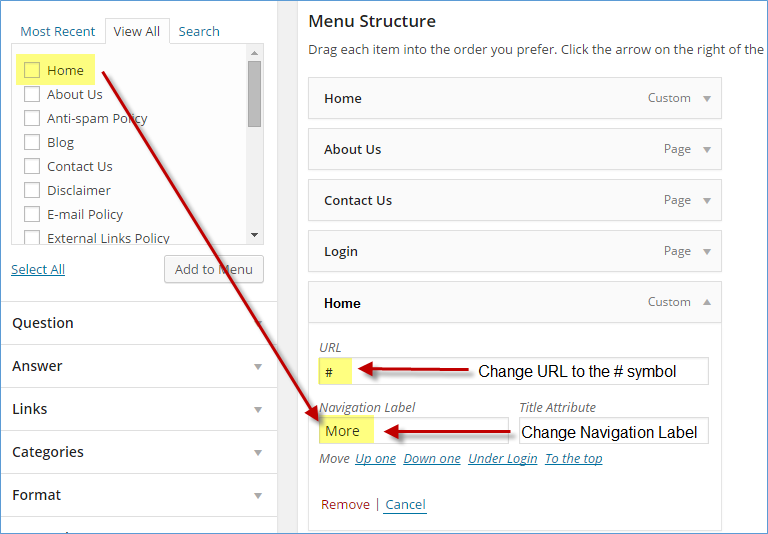
Now all that is left to do is select the pages, categories or links and Add to Menu. Make sure to position them under the More drop-down menu. Drag them slightly over to right so that they become sub-items under the More drop-down menu.
That is it! You now have a beautiful drop-down menu on your WordPress blog! I hope this helps someone. If so, be sociable, share it with your friends, leave a comment or give us a like!
